Linoleum Block Printing with Rachel Gordon
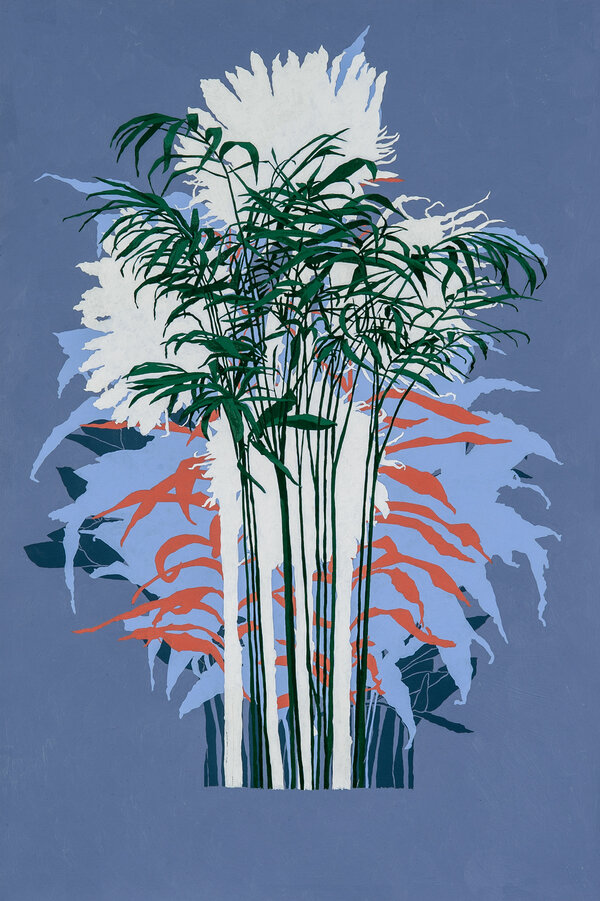
/In this workshop, printmaking artist Rachel Gordon teaches us a bit about linoleum block printing with easy-to-find items! We will be making a two-layer repeat linoleum block pattern.
Printmaking is an artistic process that involves transferring an image from one surface (“the matrix”) onto another surface (“the print”). Printmaking allows the artist to make limitless copies of their artwork, making the pieces more accessible and easily distributed.
Linoleum is a more contemporary alternative to woodblock printing, being softer and therefore easier to carve, as well as inexpensive. It is a perfect medium for beginners!
Rachel shows us how to make a repeating pattern on a piece of paper with two different linoleum blocks that you will carve and paint yourself! Rachel has used her patterns to decorate book covers, create wallpaper, and even use this process to print on cloth like bed sheets or clothing.
Materials
-Linoleum blocks (3x4 in) - you can get these at any art supply store, including the IUP supply store!
-Carving set - this comes with a carving handle, and a variety of tips called “gouges”. They are easily interchangeable.
-X-Acto Knife - carving sets will come with a knife gouge but X-Acto knives are a bit sharper and more precise
-Brayer - a roller that you use to roll out the ink onto your blocks
-Ink - Rachel uses Blick Art Materials and Speedball block printing inks
-Pencil
-Graphite pencil - a darker, heavier leaded pencil
-Tracing paper
-Newsprint paper
-Any sort of sketchpad paper
-Ruler
-A piece of thin plastic - to roll your ink out onto
-Wooden spoon
-Tape
MEET YOUR INSTRUCTOR
Rachel Gordon is an artist and musician from South Brooklyn. She makes prints and writes songs to share intimacy, jokes and heartache. Through displays of vulnerability, her work is a protest against how she's been conditioned to see sensitivity and femininity as flaws. Currently, Rachel lives in Philadelphia where she a member of Space 1026, an artist-run printmaking collective.
Step 1: Trace the shape of the linoleum block onto a piece of paper, then draw a pattern that you would like to print within that shape!
Step 2: Tape your drawing down onto a flat surface (make sure you don’t cover parts of your pattern!) and then tape down a piece of tracing paper over it so that it does not move around. Use your graphite pencil to trace the drawing. Because we are using two blocks, repeat this step with another piece of tracing paper.
Step 3: Place a block onto a flat surface, then take one of your traces and put it face down onto the block, making sure that it lines up with the edges. Here, you will go over the tracing again with the graphite pencil, leaving an impression on the block. Feel free to trace the pattern with a heavier hand so that the impression is clear! Repeat this step with the second block.
Step 4: Your final goal is to carve away the block except for the parts that you want to ink and print onto a surface. Because you are using a different color on each block, you will decide which parts you would like in one color, and which parts you would like in the other color. Rachel chose the colors black and orange, so once you decide what you would like to be black on the first block, you will carve everything away on the block except for the parts that you want to be black.
Step 5: Using your X-Acto knife, go over the lines on your shapes. This way, when you begin using your carving tools, those lines you cut will act as a stopping point for your carver, helping you create more precise shapes. Pro tips: try not to press too hard, and turn the block as you go along curves to make the job easier!
Step 6: Then, take your carving tool and, using a wider gouge so cover more area, begin to carve away at the areas you will not be inking black. Do your best to carve away from yourself so you do not accidentally hit the carver against yourself or your hand. Keep your thumb firmly on the handle, and your index finger on the base of the gouge, lined up with the gouge. Wiggling the carver around to move through the block helps!
There is no need to carve deep into the block, you just simply need to carve down a bit below the surface so that only areas you would like to print are raised.
Step 7: To carve around more delicate areas, you can switch to a smaller gouge. Feel free to move back and forth between larger and smaller gouges to get the exact shapes you’re looking for while carving! You don’t need to worry about carving clean lines in the areas you are cutting away at. If there are any areas that are still too raised that shouldn’t be, you’ll find out in the next step!
Step 8: Here, you will take the plastic sheet you have and squeeze some ink out onto the surface. You will then dab your brayer onto the ink, and start rolling it out repeatedly onto the plastic in an up and down motion, creating a thin coat of ink. Make sure the consistency is even and not too thick! You can keep dipping into the ink then rolling to make sure you get a good covering onto your brayer.
Step 9: Take your block and, without pressing too hard, begin rolling the ink onto the raised areas. Use small up-and-down strokes. Continue to roll ink onto your brayer from the plastic, then coat the block until you have a full covering, about two or three rounds of ink should do. When printing by hand as opposed to a printing press, you don’t have as much pressure, and therefore you need a bit more ink than you usually would.
Some carved parts of your block may still be raised enough to get some ink on them. To make sure that they won’t be a problem, we will do a test print!
Step 10: Grab a piece of newsprint paper, and place it onto the block (no need to worry about placement yet!), where you will then smooth the paper over the block with your hand first. Then, you will take the flatter side of the wooden spoon and use it to press the paper down onto the block. Use a circular motion to make sure all areas are sufficiently pressed down. Make sure your paper stays in the same spot!
Step 11: Gently peel the paper away, and look at your results! Note that the print comes out as a mirror image of the pattern on your block. Notice the areas where you can roll a little more ink, though as you move on and continue to ink the block over and over, you will hopefully have less inconsistency! If there are any carved areas that show up in your print, you can carve those areas out so they won’t be a problem.
Step 12: We’re almost there! Before you begin printing onto your drawing paper, map out where you would like your patterns to go. Take your ruler and pencil and measure out a grid of 3x4 inch rectangles.
Step 13: Once again, roll out your ink and ink up your block! Lay your gridded paper down, and press your block down into one of the 3x4 rectangles, lining up the edges as best as you can. Holding your block down, place a hand underneath the paper and block, and flip them over so that the paper rests on top of the block. Don’t let go of your paper so that it doesn’t move! Grab your wooden spoon and start pressing it against the paper, getting an even coating onto your paper.
Step 14: Gently peel away the paper, and voila! Make sure your pattern is within grid lines (you can always be extra careful with the next print, if it isn’t!), and that the print looks how you’d like it, then go ahead and repeat step 13 until you fill each rectangle on the paper with this pattern.
Step 15: As your paper dries with your first block pattern, wash off your brayer and begin carving your other block! Placing your blocks side by side will help you determine what to carve out of your second block. The raised, black parts of your first block will indicate what you will be carving out of your second block. You will repeat steps 4 through 11 with your second block, with orange ink. The areas you leave in will be printed in orange, filling in the rest of the rectangular prints and create a full image!
Step 16: When you are ready to make your final prints, make sure that you place your block in the right orientation so that you do not print over the black areas that you have already printed. Once again, line up the edges of the block with the lines on the paper, and press down, repeating steps 13 and 14. It can be a bit scarier lining them up when you are applying a second layer, but don’t stress, you’ve got plenty of chances to make it perfect! And even if it doesn’t line up perfectly, there is a beauty in seeing the human hand in works like this.


