Cut Paper and Collage with Jill Grimes
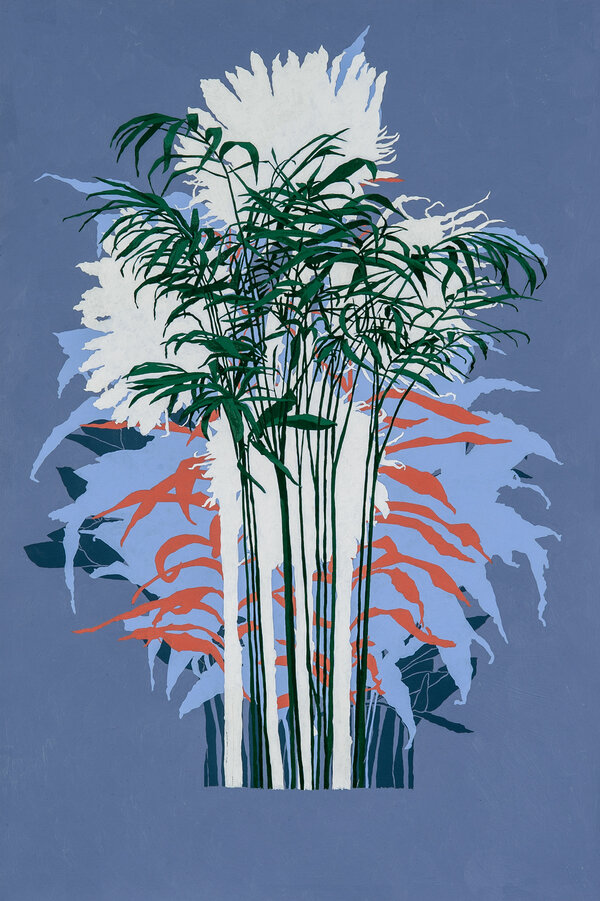
/Learn about artist Jill Grimes’ process and materials when making cut paper pieces! Jill employs multiple processes in her pieces: cut paper, painting, layering. With this process, you can create cut pieces and continue to add and interchange different types of information as you go!
Materials that Jill uses in her practice:
-Watercolor Paper (90-100 lb)
-Drawing Paper (80 to 90 lb)
-Bristol Pad
-Tracing Paper Pad
-Artist’s Tape (white)
-Matte Medium (golden is recommended)
-Elmer’s Glue or Glue stick
-1” Flat Brush with Acrylic bristles
-Various smaller round brushes for painting and glue application
-Acrylic Paint (Recommend Golden High-flow)
-Watercolors
-X-ACTO knife and blades (#11)
-Scissors
-Cutting Mat
-Pencils, erasers, pencil sharpener
-Large heavy books or gallon water jugs to press paper
Drawing paper (Jill prefers Canson brand) is more versatile and can handle different types of media. Tracing paper can be useful for creating, tracing, and repeating patterns and designs. You can use palette paper as a surface to mix paper on (plastic or styrofoam work well, too!) A cutting mat is a great, long-lasting tool, especially for cut art pieces! It provides an easy surface to cut paper and other materials on, with tools such as X-ACTO knives and blades. Other useful tools for cut paper are pencils, erasers, scissors, a ruler for straight edges and measuring, as well as brushes. You will need glue for cut paper pieces. Jill uses acrylic gel medium, which is a type of adhesive for paper. You also use regular Elmer’s glue, or even a glue stick, just be careful with the thinner, more fragile parts of your pieces so that they don’t bend or rip. Last, but not least, white artist’s tape is great for holding down your paper as it does not damage delicate surfaces and can be easily removed.
It’s good to have a range of styles and shapes of brushes. Jill enjoys using soft bristle watercolor brushes, which she uses for all types of paints and water-based media. No need to buy anything expensive if this is your first time buying brushes! Try out different types and see what works for you.
You can also work with different types of paper that already come in different colors so you can begin with a color base for drawing and coloring. Jill will prepare her paper by painting them herself. This way she can choose exactly what colors she’ll be working with in her pieces. She uses watercolor or acrylic paint on watercolor paper, the latter being more saturated and rich.
MEET YOUR INSTRUCTOR
Born in Texas, Jill Grimes received a BFA in Painting from the Kansas City Art Institute and an MFA in Painting from Boston University. She has exhibited her paintings throughout New England and the US, most recently at the Alpha Gallery in Boston, Holy Family University in Philadelphia, and The Dibden Center for the Arts at Johnson State College in Vermont. Her work has been reviewed by the Boston Globe and Art New England, and has been featured in New American Paintings and 100 Boston Painters. She has been awarded artist residencies at the Catskill Center for Conservation in New York State, and twice at The Vermont Studio Center. She is a 2014 recipient of the Blanche E. Colman Award. Grimes is a Lecturer at Boston University College of Fine Arts, where she has been teaching since 2006. She has also taught painting and drawing abroad in Venice and Umbria, Italy, for Boston University and the International School of Painting, Drawing and Sculpture. She is represented by Alpha Gallery in Boston.
STEP 1 - Generally, the first decision you should make when creating cut paper pieces is what size you would like to work with, so every piece of paper moving forward is on the same scale.
STEP 2 - The second step is preparing your paper. You can paint your paper one color, create textures with brushes, use different levels of brightness (a lighter or darker color), the possibilities are endless! Jill will start making multiple layers at once, so that she can start mixing and matching pieces that work best.
STEP 3 - Then, you begin making drawings. Jill uses Bristol paper, but you can use regular drawing paper, as well. After finishing a drawing, you can make a copy of it by using tracing paper. Place the tracing paper over your drawing, trace your drawing, then place the tracing paper over a different sheet of paper to redraw. You have then created a cut-out version of your drawing! If you create your drawing on that back of a prepared piece of paper, you can cut it out directly and have that drawing in a certain color or texture!
STEP 4 - You can then take this cut-out and place it over multiple types of backgrounds and papers and see what you like best. Have as many options as you’d like when doing cut paper pieces so that you can create a myriad of combinations with the shapes you cut out!
STEP 5 - You can also paint objects then cut them out, creating a different type of visual language than a simple white cut-out. You can also create a cut-out of that shape by turning it over to its blank side and using tracing paper to trace it.
STEP 6 - Jill will use three or four different shapes and densities for her pieces, and a variety of thickness or delicateness of her cut shapes. She will also make very intricate, delicate cut outs using an XACTO blade and cutting mat. Instead of simply cutting the outer shape, Jill will cut out the details within the object, thus creating a more detailed, complex cut-out.
STEP 7 - Now it’s time to glue your pieces down! Position your pieces how you would like them, then grab some artists tape. Cut off small pieces of tape and, starting from the top of the paper, lightly tape down bits of the cut piece. Try to avoid more delicate bits of the paper so you don’t damage them when removing the tape.
STEP 8 - Place some of your adhesive onto your palette, then, lifting from the bottom of the cut piece, use a small watercolor paintbrush to dip into the adhesive and start covering the back of the cut piece with glue. Start with the larger areas then cover the thinner parts of the piece, working section by section. Try not to use too much glue!
STEP 9 - After finishing a section, you can place parchment paper over it, then weigh it down with books so that it dries evenly while you continue gluing the rest of the piece. The same can be done when you are done gluing the entire piece, as well as placing some Bristol paper between your tracing paper and books for a more smooth surface.
STEP 10 - Once the adhesive is COMPLETELY dry, you can begin gluing on a new layer!
STEP 11 - Keep going and adding layers until you feel the piece is just right. Jill tries to store her cut paper pieces on a flat surface, preferably with weight on them, to help keep their smoothness.


